> Image and File Manager > Responsive Image Editor

Responsive Image Editor


With the release of the Image Editor tool you can now edit the images used on your websites pages directly through the editor whilst managing your pages.

To Edit Images In Your Website:

  1. Hover your mouse over an image once its added into a content page. This will bring up the standard options "Move", "Edit Property", "Copy", "Delete" and now a new option "Edit Image".
  2. Click the "Edit Image" button, this will load the new Image Editor and display the parent editing options "Crop", "Re-size", "Save" and "Exit"
  3. Once all edits have been applied and there's no further editing required click the "Save" button, this will save all the applied updates and create a new image for use on your page, note that the image will also save an updated version within the "Image and File Manager" for use on other pages.

To Crop Images In Your Website:

  1. Select the "Crop" image option, this will bring up the cropping tools listed below:

    - Crop Shape: Allows the image to be cropped as a square or Circle
    - Lock Aspect Ratio: locks the aspect ratio to 16:9, 4:3, 3:4 or 1:1
    - Zoom In: Zooms into the image
    - Zoom Out: Zooms out of the image
    - Move: Allows for the cropped area to be moved to desired areas of the image
    - Flip Horizontally: Flips the image on the horizontal aspect
    - Flip Vertically: Flips the image on the vertical aspect
    - Rotate Left: Rotates the image 45d to the left
    - Rotate Right: Rotates the image 45d to the right
    - Reset: Removes all updates that have not yet been Applied
    - Apply: Applies the edits made through the Crop options
    - Exit Crop: Exits the Crop options, regardless of applying updates

  2. Once you have updated the Crop options to match your desired output make sure to press "Apply"
  3. Once all edits have been applied and there's no further editing required click the "Save" button

To Re-size Images In Your Website:

  1. Select the "Re-size" image option, this will bring up the re-size tools.
  2. From here you can either manually input a desired Width and  Height or alternatively maneuver the display box by dragging the blue square on the bottom right of the image.
  3. Once you have updated the Re-size options to match your desired output make sure to press "Apply".
  4. Once all edits have been applied and there's no further editing required click the "Save" button.


You may also be interested in...

Was this information helpful?
Rating:  
12345 

Assess your website for FREE!

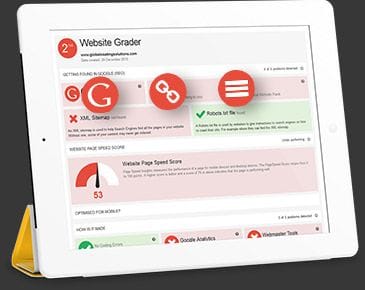
Enter your website URL, and within seconds we'll let you know where your website's strengths and weaknesses lie.


CHECK OUT OUR LATEST BLOGS

Ignite your website with helpful tips and strategies
from Bloomtools’ team of expert marketers.

The Top Five Reasons For Why Your Marketing Strategy Needs A Thank You Page

Posted by Bloomtools Canada on 22 June 2023
The Top Five Reasons For Why Your Marketing Strategy Needs A Thank You Page
When a visitor completes a particular action on a website, such as filling out a form, signing up for a newsletter, or completing a purchase, a tha...
Posted in:Content MarketingNewsWebsite PerformanceLead Generation   Comments

Growth Hacker Marketing: The Future Of Modern Marketing

Posted by Bloomtools Canada on 11 June 2023
Growth Hacker Marketing: The Future Of Modern Marketing
Between work and personal notifications on our laptops, smartphones and apple watches, sending marketing messages through modern-day technology is ...
Posted in:Content MarketingNewsSearch Engine MarketingInternet MarketingOnline Marketing   Comments

Understanding Secondary CTAs: Everything You Need to Know

Posted by Bloomtools Canada on 26 April 2023
Understanding Secondary CTAs: Everything You Need to Know
How do Secondary CTAs work?A secondary CTA is a call-to-action that provides an alternative conversion opportunity or action to the primary action ...
Posted in:WebsiteWeb Development   Comments
< Previous | 1 | 2 | 3 | 4 | 5 | 6 | 7 | 8 | 9 | 10 | Next >
PrintTell a FriendBookmark Site